So Easy a Ramen-Grilled Cheese-Microwave Popcorn-Only Skilled Chef Could Make
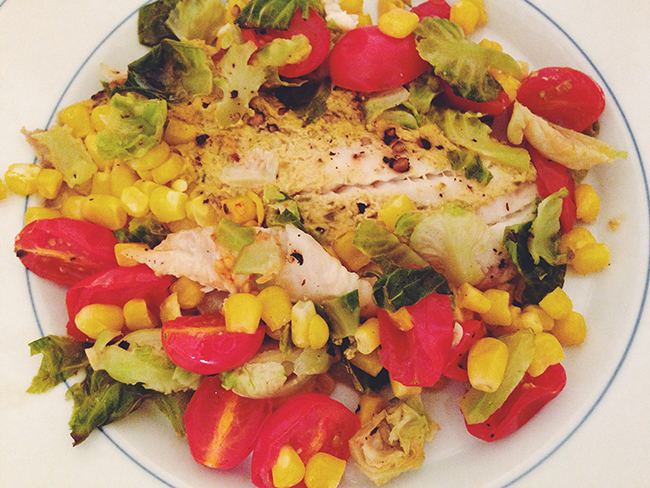
/Simple, easy, gourmet and delicious. These are the words I like to use when describing anything I'm cooking or eating. This recipe is just that. A gourmet tilapia dish so easy a ramen-grilled cheese-microwave popcorn-only skilled chef could make! You essentially place veggies, tilapia, and seasonings together in a package of foil then bake it up in the oven!
This is the ultimate "college-level" recipe that blows your average college meal away!
Before the oven.
After the oven.
Tilapia Foil Packet
serves one
Ingredients:
1-fresh or frozen fillet of tilapia. (If using frozen make sure it is thawed).
Veggies of your choice, I used shaved brussels sprouts, frozen corn (it will thaw and cook in the oven) and sliced cherry tomatoes.
Dijon mustard
salt and pepper
butter or olive oil
aluminum foil
Directions:
Preheat your oven to 450 degrees. Cut a piece of foil and place a dab of olive oil or a pat of butter in the center. Place your tilapia over it in the center of the foil. Spread mustard over the top of your fish. Arrange chopped veggies around your fish on the foil. Sprinkle everything with fresh cracked black perpper and sea salt. Pull the sides up of your foil and fold down creating a packet with your fish inside. Place on a cookie sheet and bake for 20 minutes. Your fish should be cooked perfectly after 20. Take out of the oven and enjoy the easiest gourmet meal ever!
I haven't experiment but I'm sure chicken or any other kind of fish would work as well!
Try it, let me know how it goes, and I promise anyone can do it!
Annie
D.C. Diary: The Sequel
/My adventure with D.C. didn't end this summer. Before I left I had already booked a ticket to go back a month later. The excuse for my visit was to attend the 10th anniversary of Go Bo, an amazing night full of food, friends, fun and most importantly, giving back. More on Go Bo here.
Friday morning included a much need visit with all of my SCOUT peeps, then that afternoon I got to hang out with the Georgetown University Grilling Society (GUGS). My friend I was staying with currently goes to Georgetown and talked all summer about how amazing these burgers are. The fact that they have a grilling club is legit, and their burgers are even more legit. I think I was the only there in a skirt, but I salted and sauced those burgers like a pro.
Took a darn big bite out of that GUGS burger and loved every minute of it. Full and happy, it was time to start primping for the party.
The theme for Go BO this year was tacky wedding. From the Jordan almonds to ranch dressing fountain and numerous amounts of taffeta, everything was tacky to a T. My boss sure knows how to throw a party.
The whole event was held outside under a huge wedding tent. The fabulous band led to me dancing and sweating, and more dancing and sweating, for the majority of the night.
'Twas the best night, with the best people, all for a great cause!
Now for some DC dining. I hadn't planned anything, very surprising, especially to myself. This summer I had reservations weeks in advance, but this time I was just so excited to get back I hadn't really thought about it.
This doesn't mean I didn't treat myself to some fabulous district eats. Saturday brunch on 14th street with my girl Sav and Sunday brunch in Gtown with my little piece of home, Jillian. Savannah and I interned together and Jillian is my old family friend who is currently residing in D.C.
Party-going on Friday and brunching on Saturday, left Sunday for an afternoon of exploring. My favorite part of D.C. is the scenery. I could walk the streets of Georgetown for hours snapping pictures of the beautiful row houses.
I just can't get enough of these old, painted shuttered, brick homes. Please o' please let me live in one of you someday.
'Till next time D.C.
Annie
Bites of My Life
/DIY Happy Birthday Sign
/I kind of hate the whole term "crafting" or "crafty" or "crafts." Thanks to the sorority world "crafting" has become a stereotypical pastime. I associate these words with new mommies or middle age women making burlap wreaths or detailed scrapbooks. You know what I mean? Those people who scour the aisles of Hobby Lobby and have a whole room devoted to "crafting."
This isn't saying I don't like to be creative or making things with my hands, but the word "craft" just makes me squirmy inside. I like creative and well made things not crafty painted canvases with mushy gushy pinteresty quotes. Pardon my rant, moving on.
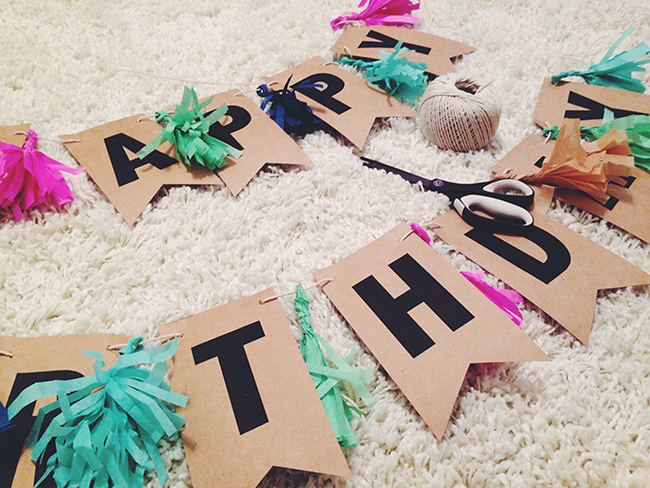
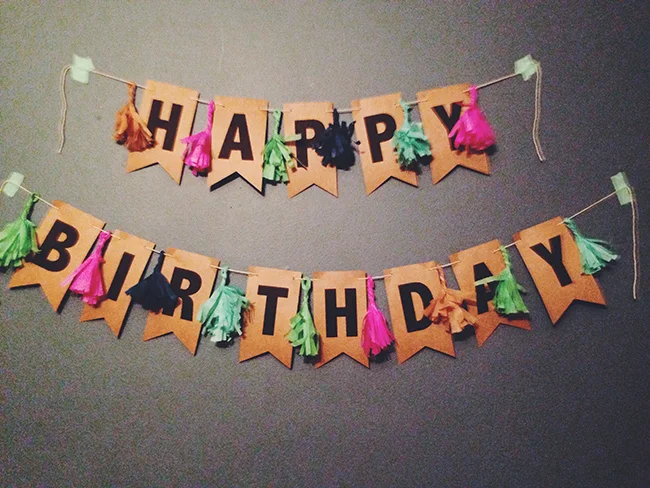
A couple of weeks ago was one of my roommate's 21st birthday and the house was in need of a little celebratory decorations! I came up with this little birthday sign and it just turned out so cute!
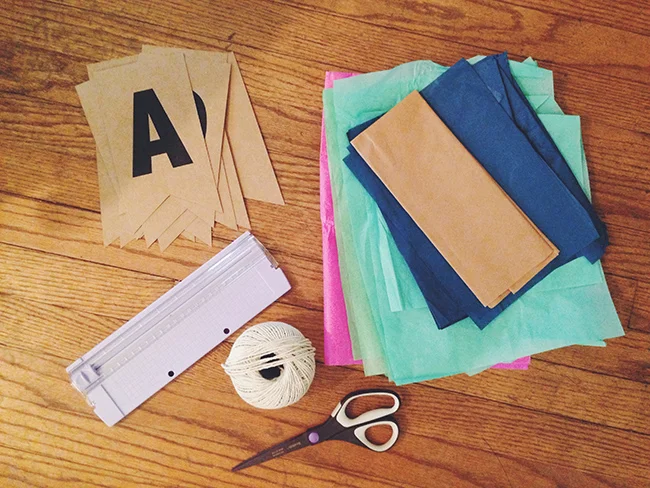
What You Need:
craft colored paper
paper cutter
scissors
hole punch
tissue paper
twine
printer
To Make:
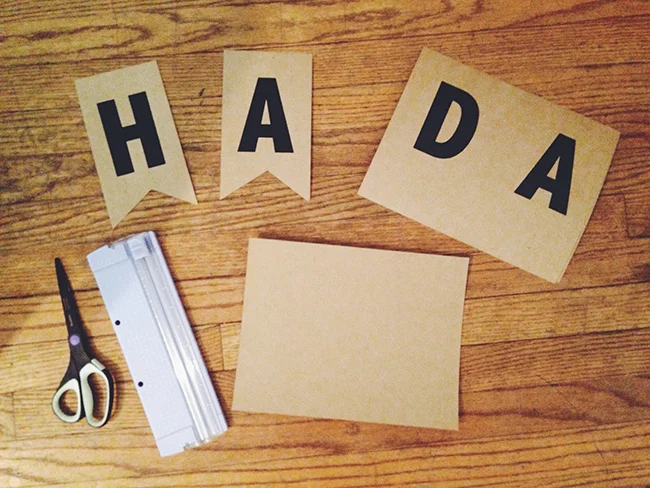
1. Create a word document with the page format in landscape. Using a bold block font in about a 450 pt. size type out whatever you want your sign to say. (Make the font large enough so two letters fit on each page).
2. Print your saying onto the craft paper. Trim each letter into a rectangle then angle the bottom to crate a pennant like design. Essentially just cutting a triangle out from the bottom.
3. Hole punch the top corners of each letter.
4. Using my instructions on how to make a tassel, create one to go between each letter. I cut my sheets of tissue paper in half to make mini tassels.
5. Now that you have your letters and tassels string them on to your twine. You can make one long sign or split each word up like I did. See below.
So this isn't a craft, but instead a creative project! You can get even more creative and use this DIY for a holiday, or include someone's name, or for a shower or party! Use green and red for Christmas, orange and black for Halloween, etc.
Annie


